Step 3: Handle Ambient Space
The Import command cannot automatically distinguish between space inside of the filter housing and space outside of the filter housing. Therefore, both parts initially have the material ID 00. However, the flow simulation has to distinguish between inside (where the fluid flow happens) and outside (where no flow happens). Therefore, we have to assign a different material ID to the outer part.
- In the Voxel Selection dialog, click Clear Selection to remove any selections still present from the previous steps. Select now a single voxel in each of the four corners of void space around the filter with CTRL + click.
- Select now the three-dimensional Flood-Fill Component and 08 Solid as New Material ID. You can enter e.g. Ambient Space as Material Information.
- Click Run to assign the ambient space to Material ID 08. This is also a check if the CAD model was watertight. If there would be a hole in the filter housing, Flood-Fill Component would leak into the interior of the filter and also fill the inner flow domain.
- After the assignment is finished, check that all the ambient space is filled with the new material and that the inner flow domain stayed unfilled. For this, slice through the model using the Slice slider in 2D or the clipping sliders in 3D. To get a better depth perception in 3D view, you can switch on the Show Outlines, Show Halo and Shadows options on the Camera tab
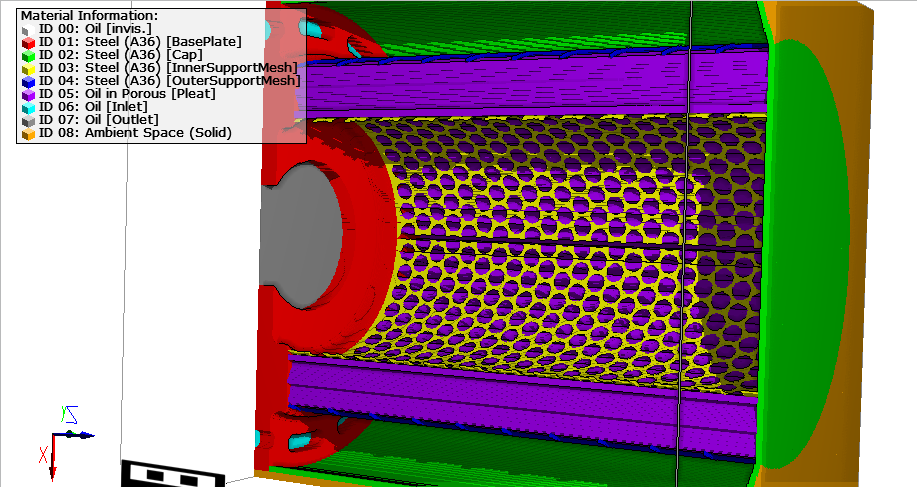
- With that done, the pre-processing steps are finished. Now, save the structure via File → Save Structure as… in the menu bar. Save it with the file name CompleteFilterWithInletAndOutlet.gdt in the /Results-User folder (if this is your chosen project folder)