Create a 3D Structure Model
After selecting a project folder, we continue the workflow by generating a micro-structure. GeoDict provides several structure generators. In this tutorial, we will generate a fibrous micro-structure with FiberGeo. Following the tutorial, the same steps could be done with any other structure generator.
For more detailed information about FiberGeo see the corresponding User Guide.
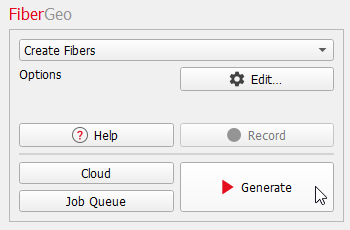
- From the menu bar, select Model. The pull-down menu displays all licensed structure generators and several modules to manipulate or post-process structures. Select FiberGeo.
- In the module section, in the bottom left of the GeoDict GUI, FiberGeo is displayed. The pull-down menu contains the different features of FiberGeo. We select Create Fibers.
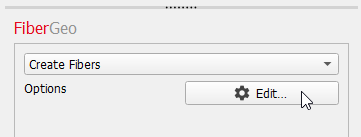
- Click the Options‘ Edit button to define the parameters for the fiber structure.
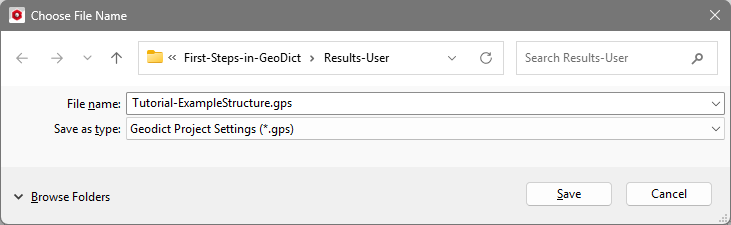
- In most option dialogs, the Result File Name is found at the top. We change the default to Tutorial-ExampleStructure.gdr. Thus, when generating the microstructure, GeoDict will save this result file and a corresponding folder with this name in the project folder. We do not change any of the other parameters.
- Observe the five icons
 at the bottom left of the dialog. These buttons are available for all GeoDict modules to save and load the setting contained in the Options dialog.
 - Clicking the first icon
 saves the current settings in a GeoDict Project Settings (*.gps) file. Enter the name Tutorial-ExampleStructure.gps and click Save.
Now the file Tutorial-ExampleStructure.gps is saved to your project folder and contains the current settings. In this case, those are the default settings in FiberGeo, but with the user-defined Tutorial-ExampleStructure.gdr as the result file name. - Click on the third icon
 to load the built-in default settings corresponding to the module. Observe that the result file name changes to FiberGeo.gdr.

- Click on the second icon
 to load the GPS file. In the opening dialog, select the just saved file Tutorial-ExampleStructure.gps and click Open. Observe that the result file name is changed again.
 - Clicking on the fourth icon
 to load start-up settings that can be set by the user (see next icon). As long as no user-defined start-up settings have been saved, the built-in default settings are loaded. If clicked, the result file name changes to FiberGeo.gdr. Repeat the previous step 8 to keep the result file name Tutorial-ExampleStructure-1.gdr.

- Clicking on the fifth icon
 saves the current settings as Startup settings. Then the saved settings are already set when GeoDict is started. This is very useful if similar structures are generated often with major changes to the build-in default settings. These settings are loaded again any time by clicking the fourth icon, described in the previous step.
 - Click OK to close the Options dialog.
- Click Generate to start the generation of the structure.