Pore Size Distribution
If starting the tutorial with this unit, start with setting the project folder as described here. The visualization settings used in this tutorial are described here.
The module PoroDict provides three different possibilities to compute pore sizes:
- Granulometry fits spheres into the pore volume, computing the largest fitting sphere for each point in the pore space. Thus, the size of the pore bodies is analyzed, not distinguishing between through pores, closed pores, and dead-end pores.
- Identify Pores introduces a segmentation of the pores. This segmentation is based on a distance transform, and a subsequent watershed algorithm, which identifies the number of pores, as well as the pore volume.
- Porosimetry is similar to the Porosimetry measurement in a laboratory. Thus, the simulation result and the measurement of the Porosimetry are comparable. The Porosimetry in GeoDict uses a saturation algorithm, pressing a non-wetting liquid into the medium and registering applied pressure and absorbed volume. Closed pores do not contribute to the pore volume at all. A higher pressure is needed at narrow parts of the pore space, and the pore bodies behind are then instantly filled. Thus, for both the laboratory measurement as well as the simulation algorithm, this method gives an analysis of the pore throats and does not directly measure the pore sizes.
The first two methods give geometrical information about the pore space. As said before, Porosimetry analyzes the pore throats which is important for transport properties. Therefore, in this tutorial Porosimetry is selected. Find the results of this analysis here.
|
Note! For more information about the parameters and results in of the Pore Size Distribution (Porosimetry) command refer to the PoroDict User Guide. |

- If it is not loaded anymore, load the structure model obtained from identifying binder in the previous unit of this tutorial. For this, select File → Open Structure (*.gdt, *.gad) from the menu bar. In the Results-User folder from the IdentifyBinder folder select the GeoDict structure file labeledStructure.gdt and click Open.
If Identify Binder was not run, load the labeled structure file from the Results-M2M folder inside the tutorial folder.
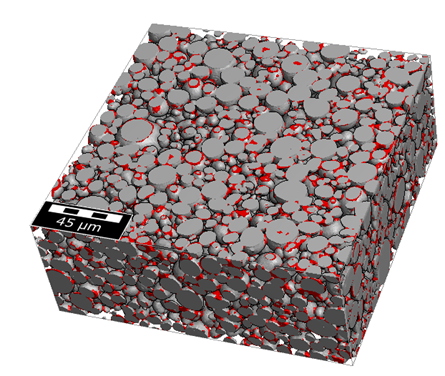
- Select Analyze → PoroDict in the menu bar.
- In the PoroDict section, left from the visualization area, select Pore Size Distribution (Porosimetry) from the pull-down menu, and click Edit.
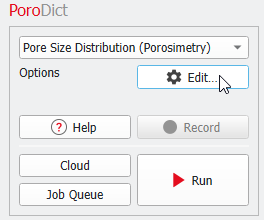
- Leave only Z- checked for Non-wetting Phase Intrusion Sides. Thus, the non-wetting phase will be intruded in Z-direction, which also would be the charging direction if a charging simulation was run on the structure.
- Then, check Write Pore Size Distribution as *.gsd File. Nothing needs to be changed under the Material Density tab.
- Click OK in the dialog and then, click Run in the main GeoDict GUI.
|
Note! The computation of the pore size distribution runs about 20 seconds and produces the file Porosimetry.gdr and the folder Porosimetry. The results will be used to compare the original data set with the statistical digital twin, created in the next part of this tutorial series Building a statistical digital twin of a cathode material. |